
Starter guide
This article provides a detailed overview of the Personal Account sections on aimlapi.com:
Playground
Once you have signed up and logged in to your personal account, you will automatically be taken to the Playground section.

Here you can start using our models immediately.
Using templates
The fastest way to start working with a chat model is to click one of the ready-made chat model task templates located above the Prompt & Input files field below:
The system will automatically select a suitable model for you and send it the template you chose on your behalf. The model will immediately start responding. In this example, we selected Email to boss:

The second type of quick actions that may be useful to you is grouped top models across different categories. Click the desired group, and all models in that group will open as tabs at the top.
If you do not want to call one of the models, simply close its tab by clicking the cross icon, or click the model name on the tab to exclude it from the request. The model name will then appear crossed out:
If the templates do not suit your needs, or if you want to choose a model yourself, the following sections are for you.
Model selection
Click the + Add Model button at the top of the page.

Models are grouped into categories: Chat, Code, Image, Video, Music, Speech, Embedding, and OCR. This helps you easily find the required model. When you select a category, only the models belonging to that group remain visible in the list below.
For the fastest search, use the Search model... filter.

Click the required model in the list, and it will appear at the top as a tab.

Parameter configuration
Input parameter configuration – allows you to adjust and define the model’s input parameters before execution. The specific set of parameters usually differs from model to model. To understand the meaning of the parameters, pay attention to the tooltips.
The full API reference for the selected model is available via the link at the top of the parameters block.
Model call
To send your own requests to the model/models, use the input block at the bottom:

In addition to a text prompt, this block allows you to (from left to right):
- attach various files (the exact set depends on the model), for example:
- images (JPG, PNG)
- documents (PDF, TXT)
- audio files (MP3, WAV)
- videos (MP4)
- specify how many recent messages text models should keep in memory when answering subsequent questions (this improves the model’s understanding of context, such as which solution approaches it has already considered for your task, etc.; however, it also increases the number of output text tokens and therefore the cost of the chat model call)
- use voice input (not supported by all models)
- the rightmost icon is used to finally send your prompt and files to the model.
To clear the chat, click the three-dot button in the top-right corner of the chat and select Delete.

In the dialog window that appears, confirm the action.
Model response block
After you configure your request and click send, it is passed to all models currently opened as tabs at the top. Model responses are displayed in order from faster models to slower ones.
The model name is displayed above each response. This becomes especially important when you call multiple models at the same time, helping you distinguish between their responses.
If you hover your mouse over the area below each response, you will see a row of buttons:
- repeat the request to this model with the same prompt
- copy the model’s entire response
- view this request as an API request (Python, JS, cURL)
- delete this response from the chat (this may be useful if you do not want the model to take this response into account in further conversation)

Billing
This section contains information about all your balance top-ups, as well as your linked payment methods. This information is grouped into three tabs: Overview, Payment methods, and Billing history.
Overview
This tab contains the most important billing-related information:
- your total balance (with Top up button)
- your default payment method
- whether auto top-up is enabled
- details of your last three payments

Actions available on this tab:
- manually top up your balance
- configure auto top-up
- remove the default payment method
Manually top up your balance
- Click Top up button.

- Select an amount (USD).
- Choose a payment method: credit card, cryptocurrency or PayPal.
- Click Top up to proceed.
- You will be redirected to the relevant payment portals, where you can fill in the required fields to complete the transaction.
Сonfigure auto top-up
Click the Edit button in the corresponding section. Available settings include:
- enabling or disabling auto top-up
- the balance threshold that triggers auto top-up
- the amount that will be automatically added to the balance

Remove the default payment method
You can also remove the default payment method by clicking the three dots and selecting Delete.

Payment methods
You can link multiple payment methods and set one of them as the default.

After clicking Add payment method, you will be redirected to Stripe to enter the required details for the payment method being added.

To remove a previously added payment method, click the three dots next to it and select Delete. After confirming the action in the modal window that appears, the payment method will be removed from the list.
Billing history
This tab contains a list of all your payments — both completed and incomplete — with the ability to view details for each transaction.

If you click View in the row of a successfully completed payment, you will be redirected to the Stripe portal, where you can download the invoice and receipt for that transaction.


If you click View in the row of an incomplete payment, you will be redirected to the Stripe portal, where you can complete the payment.


API keys
This section allows you to create, manage, and disable your API keys and Management keys.
API keys Tab

What you can do with API keys:
-
Create API Key – generate a new API key.
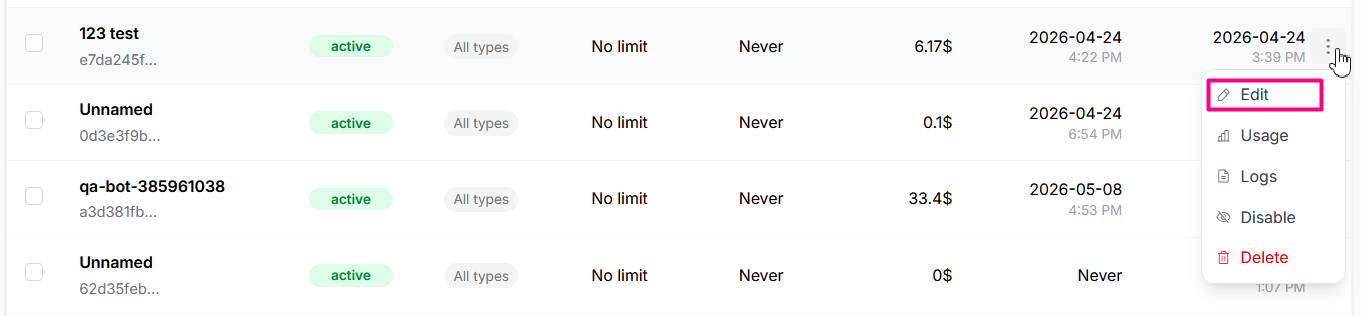
Edit – update the custom name, limits, allowed endpoints, or reset period for an existing key.
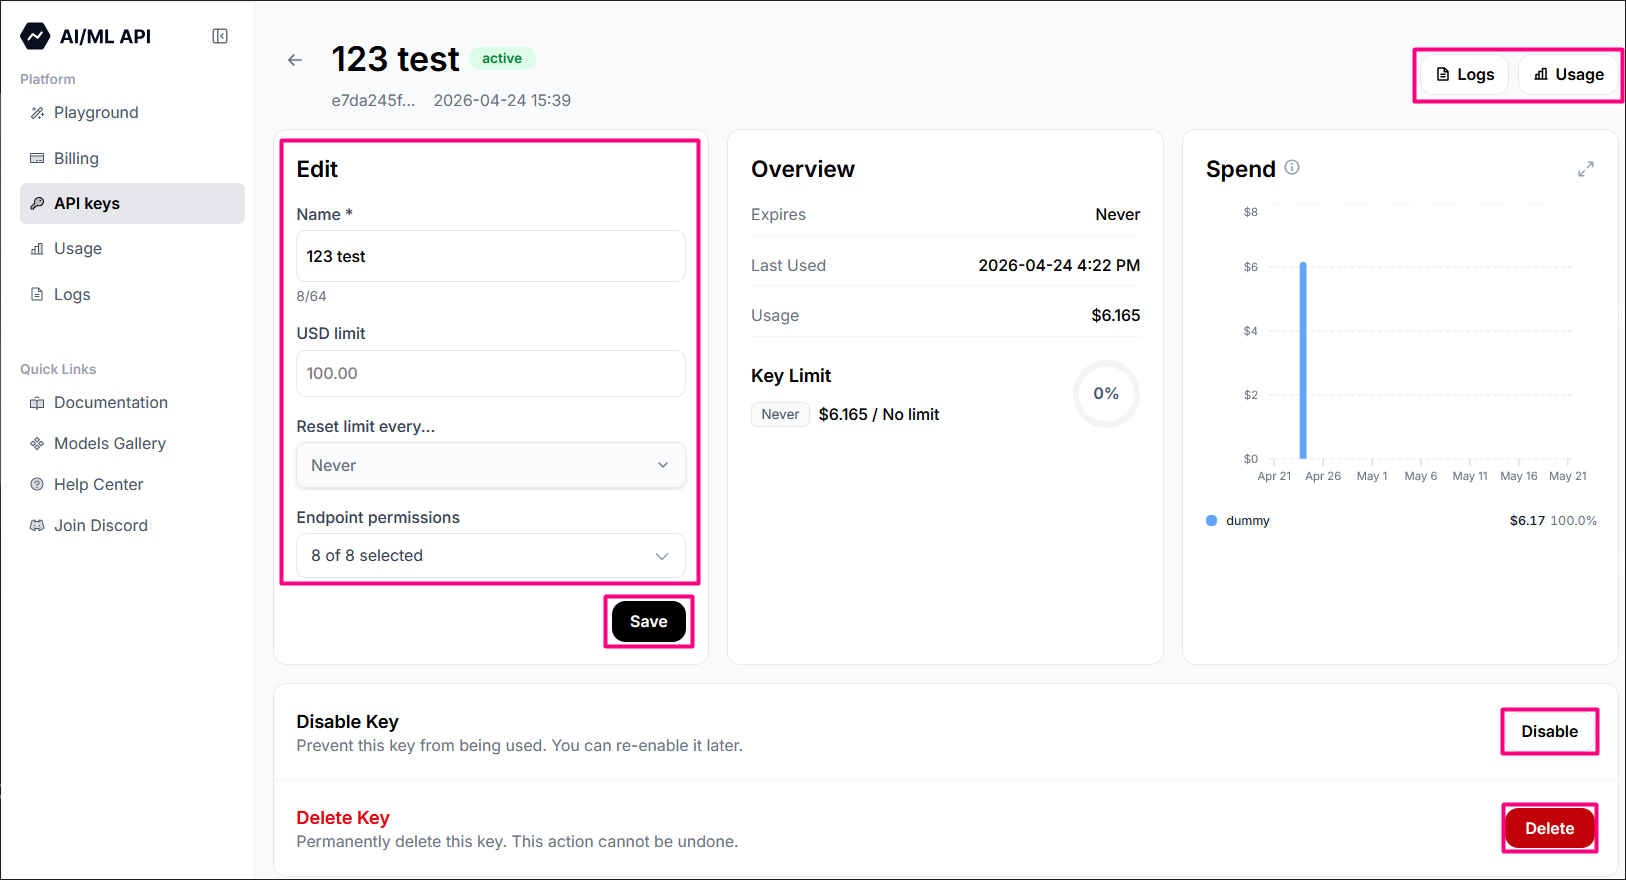
On the left side of the opened form, you can configure various API key parameters:
-
Name — the key name displayed across dashboards, lists, and filters: up to 64 characters. Uppercase and lowercase letters from different languages, numbers, spaces, punctuation marks, and some special characters are supported. For example, the following name is fully valid:
देवनागरी 汉字 Test 1234567890 !@#$%^&*()[]{}<>.,:;-"'~\/|_.We recommend using meaningful names that include project names, tasks, employee names, or AI agent identifiers. This makes it easier to track spending, locate keys in filters, and manage access across different workflows.
- USD limit — spending limit for the key (USD) within the period specified in the next field.
- Reset limit every... — spending limit reset period. Available values: Never, Daily, Weekly, and Monthly.
- Endpoint permissions — a list of checkboxes that allows you to define which of our endpoints can be accessed using this key. This provides additional control over how different keys are used across your infrastructure and applications.
-


To apply the changes, do not forget to click the Save button at the bottom of the Edit section.
- Usage – redirects to the Usage section, displaying all charges associated with the selected API key.
- Logs – redirects to the Logs section, displaying all model request logs associated with the selected API key.
- Disable/Enable – deactivate or activate an existing key.
- Delete – permanently remove an API key.
Management keys Tab
A Management key is required to create, edit, or delete API keys via the API.
See the documentation for the relevant endpoints for more details.

What you can do with management keys:
-
Create Management key – generate a new management key. Click the corresponding button on the right, then enter a name for the new management key in the dialog window that appears. You can also generate a name using AI by clicking the small button next to the key name field.
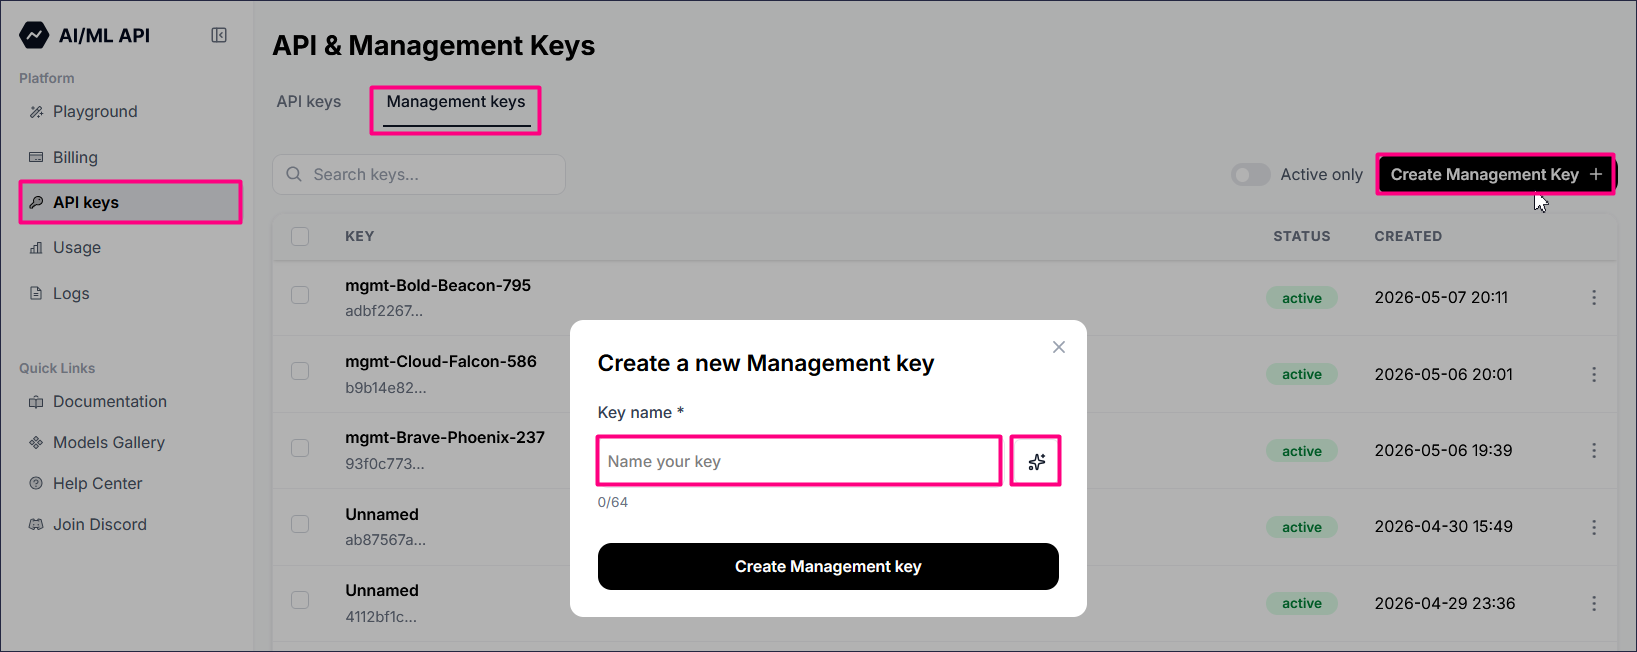

At the end, click Create Management key. The new management key will appear at the top of the keys list.
-
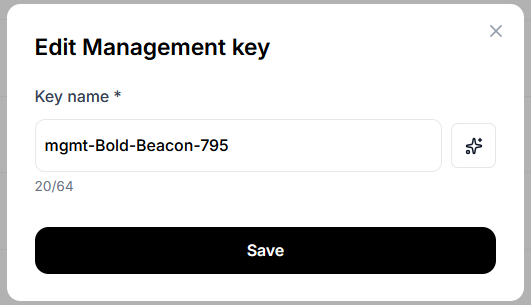
Edit – update the custom name of an existing management key. Click the three dots next to the selected key in the keys list, then choose Edit from the context menu.

In the modal window that appears, change the key name (you can also generate a name using AI by clicking the small button next to the key name field) and click Save.
-
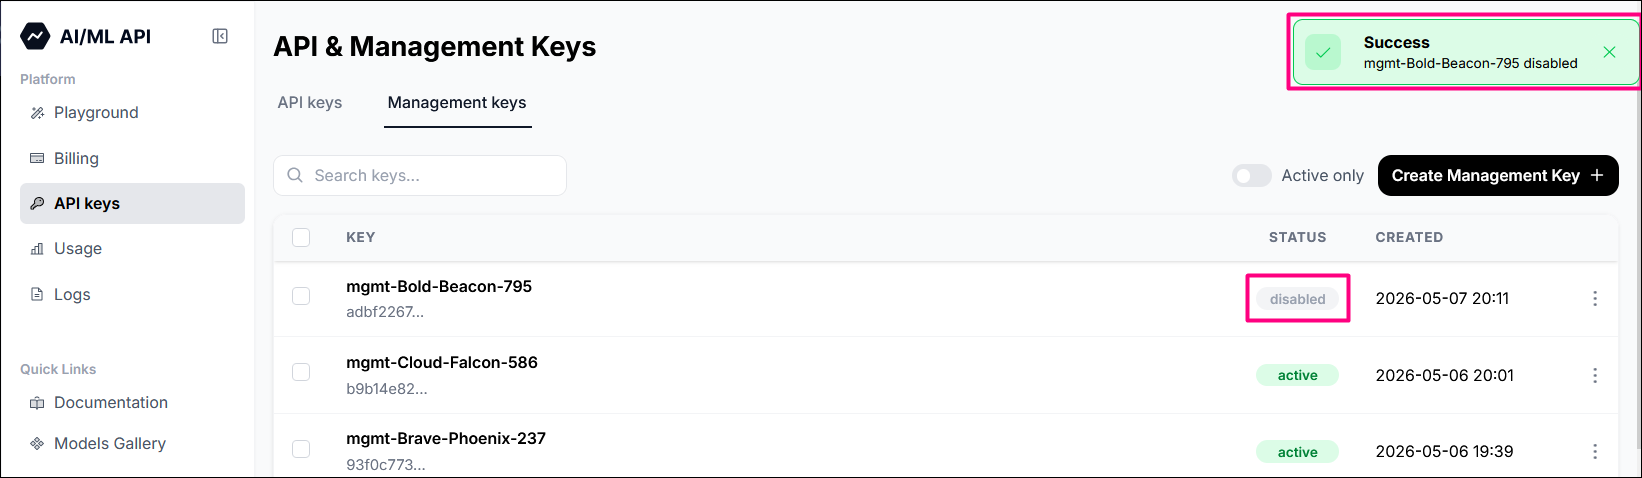
Disable/Enable – deactivate or activate an existing management key. Click the three dots next to the selected key in the keys list, then choose Disable from the context menu.

A notification will appear in the upper-right corner, and the selected key in the list will be marked as disabled:


-
Delete – permanently remove a management key. Click the three dots next to the selected key in the keys list, then choose Delete from the context menu.

A notification will appear in the upper-right corner, and the key will be removed from the list of keys.

Usage
This section contains information about all charges for model requests made from your account.
It provides detailed analytics in 3 separate dashboards for Spend, Requests, and Tokens, allowing you to monitor activity and optimize costs.

Available Filters
Filtering by API key, model, and billing period is available.

To export your data in CSV format for further analysis, click Export CSV.

Logs
This section allows a user to monitor and audit API activity. It provides a log of requests with metadata such as timestamps, API keys, models used, input/output, and associated costs. The user can use it to track usage, debug requests, verify integrations, and analyze consumption patterns over time.

When you click on one of the entries, a panel opens on the right with details of the corresponding model call.

For further assistance, visit our Support Page.